Monday, 10 October 2016

Fancy Corners

This week I've got two cards to show you that I am quite pleased with.  I love my Stampin' Up! products but unfortunately they do not make any lattice or corner dies which I wanted to try out.  I bought a set made by Tim Holz which contained four different corner dies, making it good value I thought, and they combined very happily with my SU products.

The first card is a very dramatic black and white card, which looks spectacular but was actually very simple to make.


I used Basic Black card stock for the card base and used a fancy lattice die to cut the right hand corner. So intricate but so easy.  Next I gold embossed a sentiment from the Blooms and Wishes stamp set.

So far, so good.  I then chose to back the lattice with a piece of Whisper White card,  just pasted behind. Apart from looking dramatic, this also strengthened the corner of the card which was now very delicate!

I was tempted to use coloured flowers, and will try that out too one day, but for the moment decided to go with a more or less monochrome look and die cut flower shapes from Whisper White card, using the Botanical Builder framelits.  I used a small vine shaped die from another set for the foliage but any small leafy die would do, and i used Pear Pizzazz card as I like the fresh look of it with white.

I die cut a few small flowers from gold foil card to tie in with the embossed sentiment and also a few small punched circles to add gleam to a few small flowers cut with the good old Itty Bitty punch - retired now unfortunately but you could easily substitute any tiny flower shape.

I played around with the shapes until I found a pleasing arrangement and then stuck down the vine leaves, then the white flowers and elevated the larger flowers and one daisy shaped flower with foam dimensionals to lift them. I glued the small gold punched dots onto the smallest flowers and used candy dots from the subtles collection - Pear Pizzazz obviously.

Finished, apart from pasting a piece of white card stock inside for the message to be written on.

I'm pleased with this simple design because I think it would be suitable for many occasions depending on the sentiment and colours chosen.  I can imagine it for a wedding card, birthday, special anniversary, even a get well card or Easter card.

*****

Next a small, lively card using the honeycomb shaped corner die from the same die set and a Whisper White card base.


I tried this card a couple of times and found that the best way was to stamp the card first, before cutting the fretwork.   I used the  stamp set and Pear Pizzazz ink pad to decorate the right hand top corner of the card, and added a few bright accents with Melon Mambo ink.

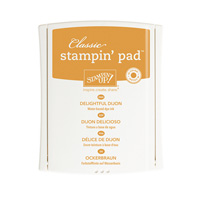
On a separate scrap of card, I printed two or three bees, using Basic Black, stamped off first, and Delightful Dijon for the bee's body, again stamped off first. I then fussy cut them out which was not that tricky and played around positioning them where I thought best.  I ended up using just two, which I stuck on with foam dimensionals to lift them and highlight them.

I spent ages trying out different ways of adding the sentiment and finally decided to keep it simple and unfussy, by using a circle of Pear Pizzazz  card cut with a 1 3/8" punch and a small hand cut scrap of white card with a sentiment from the stamp set that comes with the Watercolour Wishes card kit.  I've said before that this stamp set is worth the price alone, it has such good sentiments, and you get a whole lot of extras to use too..

Finally, I decided to glue a square of vellum behind the front of the card which gave a lovely translucent look and again, strengthened the intricate lattice.

There are two more interesting dies in the Tim Holz set and perhaps I will try those next, but I must admit I am going into full-on Christmas mode now and planning to get all my Christmas cards and gift tags done early and not leave them until the last minute as usual!

I hope you like these cards that illustrate how well Stampin' Up! products can be used in conjunction with other dies you may already have, and hopefully SU will come up with some lovely corner dies of their own soon.

Remember to leave your email address if you haven't already as I will be drawing a name at random at Christmas and sending the lucky winner a few SU goodies for their Christmas stocking.

Thanks for dropping by.

Jane

  Product List

Sunday, 2 October 2016

Not your usual Christmas cards

Everyone is doing Christmas cards at the moment.  The new Seasonal Stampin' Up! catalogue is out and there are some amazing stamp sets, dies and punches in it.  If you've got children, grandchildren or are just young at heart, there are some marvellously cute ideas with gingerbread men, reindeer, Santa Claus and even dinky little 3D houses! Loads of Halloween stuff too if that is something you like.

But today, I'm showing a few 'alternative' Christmas cards.  Alternative in that they are not the usual colours you expect for Christmas and there's not a Christmas tree in sight!

These cards are suitable for all types - even those whose faith doesn't traditionally celebrate Christmas, but who still want to share in the excitement and general feeling of goodwill to each other.

For the first card, I chose Basic Grey card stock, quite a dark, charcoal grey - and pasted a piece of grey wood grain patterned paper from the Little Foyxy paper stack on top.


Next I assembled the sentiment motif.  I silver-embossed a greeting from the Stitched with Cheer stamp set onto a scrap of Whisper White card.  I glued this at an angle onto a slightly larger piece of red foil card and decorated the top left hand corner with two small holly leaves and some berries cut from green and red foil card.  Stampin' Up! have a great punch for these which would have saved time, but I don't have it yet so I had to make do with something else in the meantime.

I tied a piece of silvery twine around the front of the card vertically, and then using foam dimensionals, I positioned the sentiment on top, making sure the I left a channel free for the twine.

And that was that, except for stamping a few snowflakes on the inside. A good card suitable for either sex, workmates - basically anyone! And very quick too.

****

The next card is wonderfully textured like a thick Aran sweater.  You will have seen vases and mugs with a knitted texture and cushions made with very thick yarn, etc in the shops and SU are very tuned in to current trends, so it's obvious that cards will reflect the fashion too.


The base card is cut from Crumb Cake card stock, layered with a piece of Sahara Sand card that has been run through a Big Shot machine with the Cable Knit embossing folder.  This is an extra deep folder because it creates such a deep impression in the card.  It's really gorgeous and a folder everyone will want when they see the results in the flesh.  Photos don't really do it justice - especially mine!

As in the last card, I assembled a sentiment motif using Chocolate Chip card stock, layered with Very Vanilla card which had previously been stamped using the Fairisle knitting stamp from Stitched with Cheer set in Soft Suede ink.  I did this to emphasise the 'knitted' look which is so trendy at the moment.

I punched out a circle of gold foil card with the  3.5cm  punch and another in Chocolate Chip, which I heat embossed with gold first.  The sentiment seemed particularly apt - "have a cosy season!"

This time I cut the holly leaves out in gold to add to the richness and just the berries were cut in red foil to provide an accent.

Thick Very Vanilla Baker's Twine was tied around the card (actually before the knitted texture was stuck down) to add to the general Aran knitted look, but you could easily substitute gold cord or something suitable

Inside, a few snowflakes again and we're done!

*****

I might be pushing it a bit with the last card - black, white and copper - but why not!


Jet black base card was layered with startling Whisper White card stock that had previously been run through the Big Shot with a dotted texture embossing folder, to give a snowball-like texture.  This particular folder has been retired but you could easily use the current Softly Falling folder to get the same effect.

On top of this I have layered a beautiful piece of vellum which has been printed with fine black snowflakes.  Again, this is stock from the recent clearance rack sale but you could print your own vellum easily with a fine snowflake stamp.

The sentiment I have chosen means something to everyone regardless of faith, and again is part of the Stitched with Cheer stamp set.  I have embossed this in copper, together with two tiny stars from the same set, on Whisper White card and cut it out with one of the dies from the Lots of Labels framelits.

I mounted the sentiment on a piece of beautiful copper foil card (so gorgeous, it has to be seen) which I have hand cut just slightly larger then the sentiment tag.

My cheat tip for doing this is to lay the framelit used for the sentiment onto the back of the foil card and to trace round the outside shape with a pencil.  This is then much easier to fussy cut with an equal border surrounding the white tag.  This set of framelits does have many sizes of this shape but I only wanted a narrow border so that it fitted the small card I was making.

The  tag was then mounted with foam pads and everything positioned and glued into place.  I used a small knot of copper coloured cord to embellish the card, stuck down with a heavy duty glue dot.  ( I cheated and bought this cord in Hobbycraft. Shh, don't tell anyone!)

Inside, I have pasted a square of white paper so that the message can be seen easily when written, and  I've added a couple of snowflakes to link everything together.

Well, I hope you like my "alternative" Christmas cards, or should I say "Seasonal" cards, and I will be doing some more obvious Christmas cards in the weeks to come.

Remember to sign up for my emails as I shall be drawing a name at random at Christmas and sending one lucky person some SU goodies to play with.

Thanks  for stopping by.

Jane


Product List

Wednesday, 7 September 2016

Just Peachy

Today's card is made using the Flourish Thinlits dies.  Very simple to make, but pretty and versatile.

I have used shades of pink and peach but it would look pretty in other combinations, for example:

* Reds and dark pinks for a Ruby Wedding Card
* Greys, mauves and Silver for a Silver Wedding Card
* Shades of yellow and Gold for a Gold Wedding Card
* Shades of blues and mauves - for just about any other Wedding Anniversary Card!

The base card, in this instance, is the beautiful strawberry pink colour called Flirty Flamingo, which is one of this year's In Colours.  Next a layer of Peekaboo Peach, also an In Colour, and finally a layer of Very Vanilla - rather than white, to add to the "peachiness".


Using the single large flower die from the set and the two medium ones, I cut out one large flower in Flirty Flamingo, one medium sized bloom in Peekaboo Peach, another in Pink Pirouette and several tiny flowers in Peekaboo Peach, Pink Pirouette and a couple in Watermelon Wonder, just to 'spike' the colours and prevent them looking bland.

Now the clever bit - well clever for me! When you cut the flower shapes, you are left with a negative template which you can use as a stencil. Place the large flower stencil on the vanilla card where you need it and carefully dab ink with a sponge to create a soft image of the flower.  I used the sponge daubers for this because I find them best for sponging small areas but you could also use the ordinary SU sponge.

Do the same with the two medium sized blooms.  I used Peekaboo Peach behind the large flower, and Blushing Bride behind the other two flowers.  Using slightly different shades to the cut flowers gives more depth to the card.

Next I took one of the small leaf sprays from the Blooms and Wishes stamp set, and using Pear Pizazz ink, printed some background foliage to link the flowers and fill the gaps between them.

Lastly, I glued the intricately cut shapes onto the cards as appropriate and added small pearls to fill the flower centres,

The sentiment, stamped in Basic Grey, is from the set that comes with the Watercolour Wishes card set (a really useful set of sentiments that is worth more than £20 on its own, without all the additional items in the kit).

As usual, I added a rectangle of Very Vanilla on the inside of the card so that the message was more visible.

I hope you like this card and see the possibilities of different colour ways.

If you haven't already left your email address (and verified it), please do so as I shall be drawing a name at random at Christmas and sending some free SU goodies to the lucky individual.

Jane

  Product List