The first card is a very dramatic black and white card, which looks spectacular but was actually very simple to make.
I used Basic Black card stock for the card base and used a fancy lattice die to cut the right hand corner. So intricate but so easy. Next I gold embossed a sentiment from the Blooms and Wishes stamp set.
So far, so good. I then chose to back the lattice with a piece of Whisper White card, just pasted behind. Apart from looking dramatic, this also strengthened the corner of the card which was now very delicate!
I was tempted to use coloured flowers, and will try that out too one day, but for the moment decided to go with a more or less monochrome look and die cut flower shapes from Whisper White card, using the Botanical Builder framelits. I used a small vine shaped die from another set for the foliage but any small leafy die would do, and i used Pear Pizzazz card as I like the fresh look of it with white.
I die cut a few small flowers from gold foil card to tie in with the embossed sentiment and also a few small punched circles to add gleam to a few small flowers cut with the good old Itty Bitty punch - retired now unfortunately but you could easily substitute any tiny flower shape.
I played around with the shapes until I found a pleasing arrangement and then stuck down the vine leaves, then the white flowers and elevated the larger flowers and one daisy shaped flower with foam dimensionals to lift them. I glued the small gold punched dots onto the smallest flowers and used candy dots from the subtles collection - Pear Pizzazz obviously.
Finished, apart from pasting a piece of white card stock inside for the message to be written on.
I'm pleased with this simple design because I think it would be suitable for many occasions depending on the sentiment and colours chosen. I can imagine it for a wedding card, birthday, special anniversary, even a get well card or Easter card.
*****
Next a small, lively card using the honeycomb shaped corner die from the same die set and a Whisper White card base.
I tried this card a couple of times and found that the best way was to stamp the card first, before cutting the fretwork. I used the stamp set and Pear Pizzazz ink pad to decorate the right hand top corner of the card, and added a few bright accents with Melon Mambo ink.
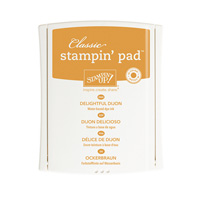
On a separate scrap of card, I printed two or three bees, using Basic Black, stamped off first, and Delightful Dijon for the bee's body, again stamped off first. I then fussy cut them out which was not that tricky and played around positioning them where I thought best. I ended up using just two, which I stuck on with foam dimensionals to lift them and highlight them.
I spent ages trying out different ways of adding the sentiment and finally decided to keep it simple and unfussy, by using a circle of Pear Pizzazz card cut with a 1 3/8" punch and a small hand cut scrap of white card with a sentiment from the stamp set that comes with the Watercolour Wishes card kit. I've said before that this stamp set is worth the price alone, it has such good sentiments, and you get a whole lot of extras to use too..
Finally, I decided to glue a square of vellum behind the front of the card which gave a lovely translucent look and again, strengthened the intricate lattice.
There are two more interesting dies in the Tim Holz set and perhaps I will try those next, but I must admit I am going into full-on Christmas mode now and planning to get all my Christmas cards and gift tags done early and not leave them until the last minute as usual!
I hope you like these cards that illustrate how well Stampin' Up! products can be used in conjunction with other dies you may already have, and hopefully SU will come up with some lovely corner dies of their own soon.
Remember to leave your email address if you haven't already as I will be drawing a name at random at Christmas and sending the lucky winner a few SU goodies for their Christmas stocking.
Thanks for dropping by.
Jane
Product List


