Wednesday, 7 September 2016

Just Peachy

Today's card is made using the Flourish Thinlits dies.  Very simple to make, but pretty and versatile.

I have used shades of pink and peach but it would look pretty in other combinations, for example:

* Reds and dark pinks for a Ruby Wedding Card
* Greys, mauves and Silver for a Silver Wedding Card
* Shades of yellow and Gold for a Gold Wedding Card
* Shades of blues and mauves - for just about any other Wedding Anniversary Card!

The base card, in this instance, is the beautiful strawberry pink colour called Flirty Flamingo, which is one of this year's In Colours.  Next a layer of Peekaboo Peach, also an In Colour, and finally a layer of Very Vanilla - rather than white, to add to the "peachiness".


Using the single large flower die from the set and the two medium ones, I cut out one large flower in Flirty Flamingo, one medium sized bloom in Peekaboo Peach, another in Pink Pirouette and several tiny flowers in Peekaboo Peach, Pink Pirouette and a couple in Watermelon Wonder, just to 'spike' the colours and prevent them looking bland.

Now the clever bit - well clever for me! When you cut the flower shapes, you are left with a negative template which you can use as a stencil. Place the large flower stencil on the vanilla card where you need it and carefully dab ink with a sponge to create a soft image of the flower.  I used the sponge daubers for this because I find them best for sponging small areas but you could also use the ordinary SU sponge.

Do the same with the two medium sized blooms.  I used Peekaboo Peach behind the large flower, and Blushing Bride behind the other two flowers.  Using slightly different shades to the cut flowers gives more depth to the card.

Next I took one of the small leaf sprays from the Blooms and Wishes stamp set, and using Pear Pizazz ink, printed some background foliage to link the flowers and fill the gaps between them.

Lastly, I glued the intricately cut shapes onto the cards as appropriate and added small pearls to fill the flower centres,

The sentiment, stamped in Basic Grey, is from the set that comes with the Watercolour Wishes card set (a really useful set of sentiments that is worth more than £20 on its own, without all the additional items in the kit).

As usual, I added a rectangle of Very Vanilla on the inside of the card so that the message was more visible.

I hope you like this card and see the possibilities of different colour ways.

If you haven't already left your email address (and verified it), please do so as I shall be drawing a name at random at Christmas and sending some free SU goodies to the lucky individual.

Jane

  Product List

Wednesday, 31 August 2016

Up, up and away!

A simple  birthday card today, that I think could be suitable for anyone, whatever age.

As I specialise in small cards, I find images of balloons difficult to 'squeeze in', but they are such a symbol for happiness and celebration that I felt I must persevere!

I didn't want a card that looked particularly "childish", so I chose a base card in Basic Grey, which is a soft charcoal grey colour, darker than my usual grey.


I chose Soft Sky - an obvious choice - as a square mat on top.  The clouds are heat embossed with white on Vellum paper which gives them a lovely subtle transparency and they look 'light as air', and I punched them out using the tree builder punch  from SU.  I positioned one cloud to overlap onto the grey card to demonstrate the opaque quality and because I like images to be unconfined by the frame.

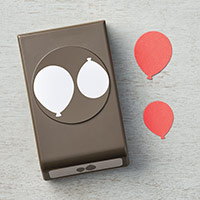
The balloon is actually a deeper shade than appears in the photo using the Balloon Celebration stamps and heat embossed in silver on Pool Party card.  Then punched out with the coordinating punch and positioned with a foam dimensional; the 'string'  stamped  directly onto the card.

My favourite are the bunting flags.  I cut these from a sheet of paper from the Little Foxy DSP paper stack.  They were quite easy to fussy cut, being straight lines.  The first string of flags were glued directly onto the card but I wanted the larger string to stand out more and appear to be flying off the page, so I roughly cut the image and carefully glued it to plain white card, then fussy cut it out.  This made it less flimsy and I managed to fix strips of foam dimensionals on the back and attach it to the card. This bit was a little tricky and I'm horribly aware that you can see tiny bits of foam peeking out!  (note to self: must try harder).

The obvious choice for the banner would have been Calypso Coral to coordinate with the flags, but I like to add an 'edge' sometimes so chose Bermuda Bay, a deep turquoise-y green which toned with the blues used.  The greeting was heat embossed with silver and a couple of stars added.

Sounds  complicated and a bit fiddly, but the elements can be made separately and then assembled so less chance of messing it up!  I glued a rectangle of Whisper White card inside and stamped a bit of cloud and a ballon at the edge to bring the whole thing together.

Hope you like this card and remember, if you add your email address for updates, I will be picking one at random at Christmas and sending the winner some Stamping' Up! goodies.

Thanks for dropping by.

Jane


Product List

Tuesday, 16 August 2016

Totally Awesome Totally Trees!

In every catalogue there are always a few stunning stamps that hit you right between the eyes.  Well this set is not one of them!

This set, which is a preview from the forthcoming Autumn/Winter catalogue, seems unassuming and low key at first glance, but this is just the sort that I like because very often you find you get far more mileage out of them.

It has to be said I like trees.  Because they are not as "girlie" as flowers and butterflies, they are suitable for men and women alike and as they are not too "cutesy", they are perfect for acquaintances you may not know so well and  want a slightly less personal card for.

This set has a variety of tree styles to play with and by changing the colours, you can give the card a sense of the different seasons adding blossom for Spring, golds and yellows for Autumn and bare branches for Winter.  There is even a palm tree and coconuts for a jungle or beach look!

Here are four small cards made as a set. Different colour bases, but all with a Whisper White mat mounted on Chocolate Chip card.  The colours have been chosen to link the cards together and in each case, one tree has been fussy cut and elevated with foam stickers to add dimension. The background tree colour has been stamped on scrap paper first to fade the colour slightly.

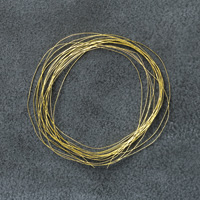
The sentiments are neat and small in keeping with the card size and I have used a little strip of copper washi tape or a twist of gold thread to add interest. Oh and I almost forgot, a few spatters from the tried and trusted Timeless Textures!

All the products I used are at the end of this post and I think it is easy to see which colours are which.


Now all I need to do is make a small matching packet to put them in and they will make an excellent small gift or stocking filler for someone.

I hope you like these cards and feel inspired to go "Totally Trees"!  If you would like to purchase any of the supplies, please use my online shop. The Autumn/Winter catalogue will be available online from September and it is full of beautiful Halloween and Christmas ideas plus special embellishments and a some other new stamp sets which I hope to showcase soon.

Thanks for dropping by and I hope you will add your email address to receive updates as I shall draw a name from a hat at Christmas and send the lucky person a small gift of Stampin'Up! goodies.

Cheers

Jane !-------- TAMS Start ----------> Product List